Forget the endless cycle of scrubbing and piling on primer. Achieving a truly flawless foundation finish on dry, flaky skin isn’t about the products you use, but the surface architecture you build. The secret lies in understanding the molecular compatibility of your skincare and mastering techniques that respect the skin’s integrity, transforming a problematic canvas into a smooth, light-reflective structure ready for makeup artistry.
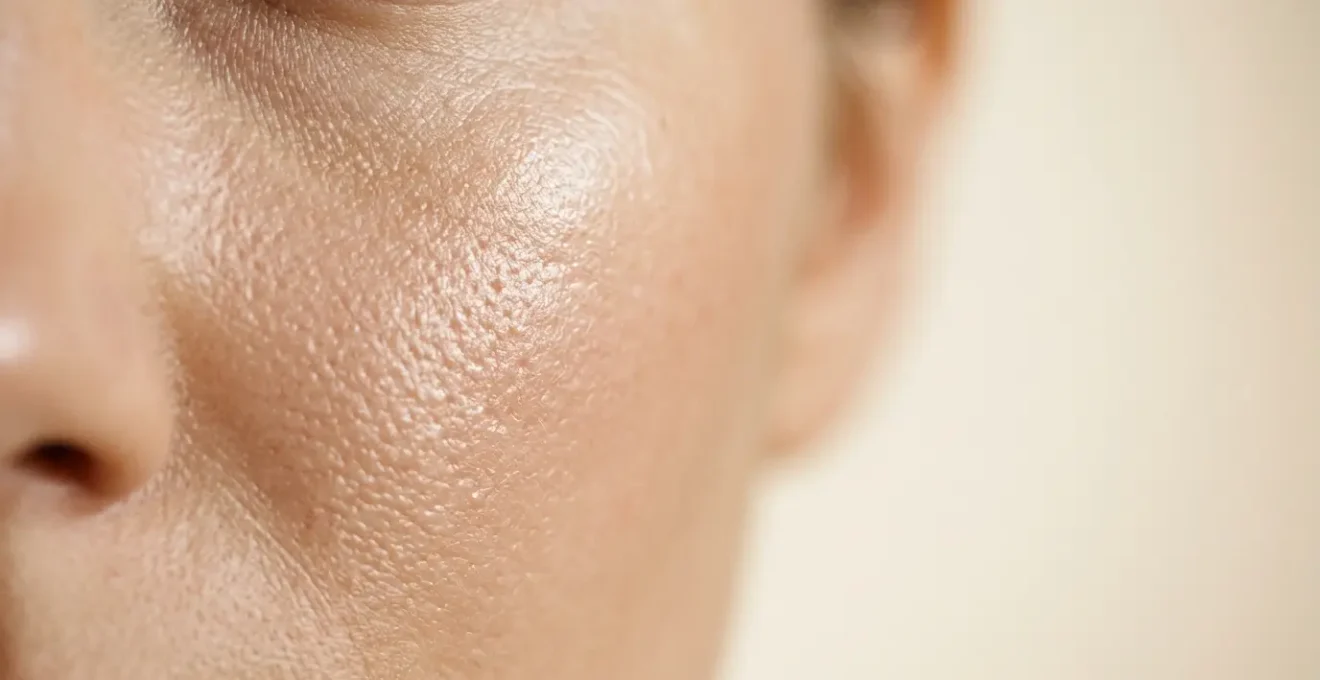
You follow all the rules. You exfoliate, you moisturize, you prime. Yet, by midday, your foundation has betrayed you. It clings to dry patches you didn’t even know you had, creating a cakey, textured mess that looks anything but flawless. This frustrating cycle is a common complaint I hear from clients and models alike. The conventional wisdom tells you to scrub harder and layer on more hydrating products, but this often makes the problem worse, irritating the skin and causing makeup to slide right off.
The truth is, the advice you’ve been following is incomplete. It treats the skin like a simple, flat canvas to be spackled over. As a makeup artist, I see skin differently—as a dynamic, three-dimensional structure. The real artistry happens before the brush even touches your face. It’s about understanding the science of adhesion, hydration, and texture at a microscopic level. It’s about building a flawless base through meticulous skin engineering, not just product application.
This is where we move beyond the generic tips. We’re going to deconstruct the process, looking at why certain methods fail and what professional-grade alternatives exist. We will explore the science of why enzymes are superior to physical scrubs for creating smoothness, how to match your primer and moisturizer to avoid pilling, and the precise timing needed between skincare steps. It’s time to stop fighting your skin and start working with it, architecting a surface so perfect that your foundation becomes a seamless second skin.
This guide will walk you through the essential pillars of professional skin preparation. By mastering these concepts, you’ll understand not just the ‘what’, but the critical ‘why’ behind each step, ensuring your makeup looks impeccable from the first application to the final curtain call.
Summary: How to Prep Flaky Skin for a Flawless Foundation Finish
- Why enzymes are better than scrubs for smoothing texture before makeup?
- How to choose a primer based on your moisturizer base (Water vs. Silicone)?
- Shaving vs. Waxing: Which gives a smoother canvas for foundation?
- The moisturizer mistake that makes your makeup slide off by noon
- When to apply foundation after SPF to avoid patchiness?
- How to apply SPF to ensure spot prevention in high UV index?
- Why facial massage reduces cortisol levels after a chaotic workday?
- Why Do You Keep Getting Blackheads Despite Washing Your Face Twice a Day?
Why enzymes are better than scrubs for smoothing texture before makeup?
For decades, the go-to solution for flaky skin has been a gritty physical scrub. The logic seems sound: manually buff away the dead cells. However, this is an act of demolition, not artistry. Scrubs create microscopic tears in the skin, leading to irritation, inflammation, and an even more compromised skin barrier. This is the opposite of the smooth, calm surface we need for foundation. The professional’s secret is to work smarter, not harder, through selective deconstruction using enzymes.
Fruit enzymes, like papain from papaya or bromelain from pineapple, are biological catalysts. They work by dissolving the specific protein “glue” that holds dead skin cells together, leaving the healthy, living cells underneath completely untouched. It’s like a highly skilled sculptor carefully chipping away unwanted material, rather than taking a sledgehammer to the block. This gentle-yet-effective process reveals a smoother, more radiant surface without the collateral damage of physical exfoliation. In fact, a 2021 systematic review confirmed that enzymes effectively exfoliate and improve skin characteristics, despite being a less-studied method.

This targeted approach is why your skin feels polished and soft after an enzyme treatment, not raw and stripped. A study on a papain-based lotion highlighted its ability to significantly improve skin texture by targeting only the dead protein bonds. By dissolving only what needs to go, you create the perfect architectural foundation for makeup. The surface is uniform and receptive, allowing foundation to lay down evenly instead of catching on the rough, irritated terrain left behind by a harsh scrub.
How to choose a primer based on your moisturizer base (Water vs. Silicone)?
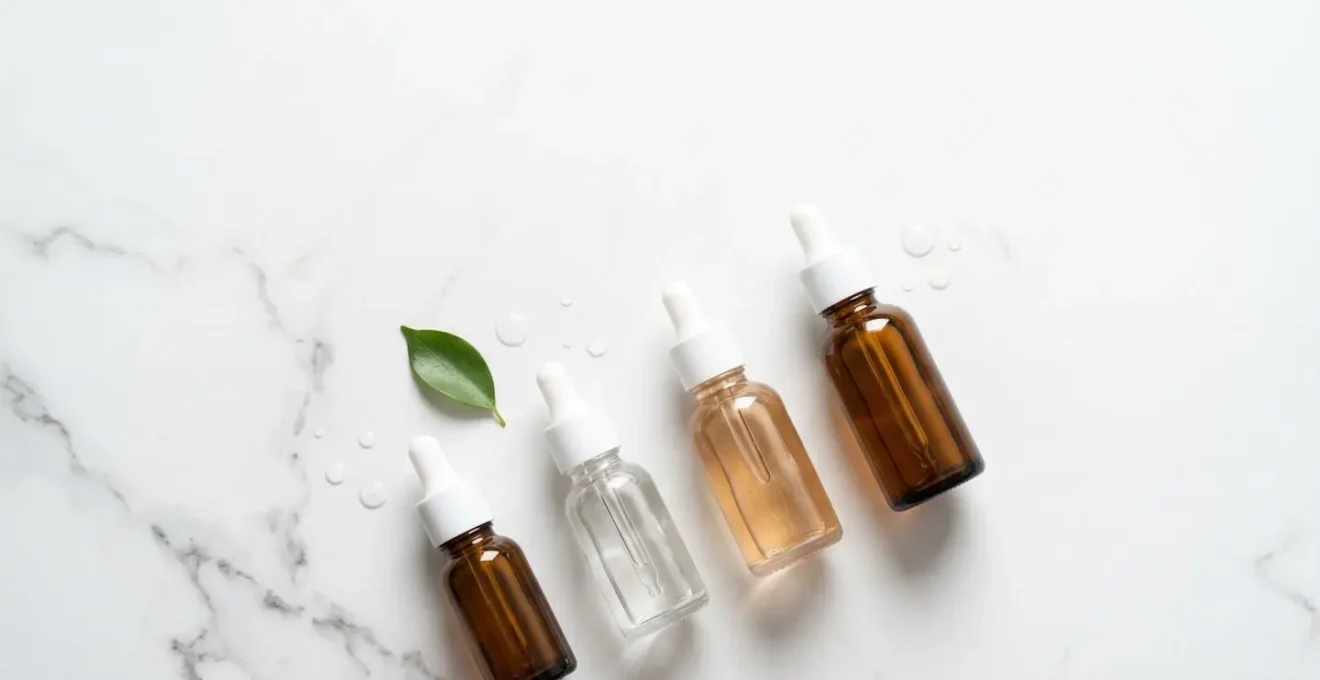
You’ve perfectly prepped your skin, but the moment you apply primer, it starts to ball up and pill. This is one of the most common points of failure in makeup application, and the culprit is almost always a lack of molecular compatibility. Think of it like trying to mix oil and water; some formulas are simply not designed to coexist. The most critical relationship to manage is between your moisturizer and your primer.
Most skincare and makeup products fall into two primary categories: water-based or silicone-based. You can identify them by checking the first few ingredients on the label. If you see ingredients like “aqua” or “water” listed first, it’s water-based. If you see words ending in “-cone,” “-methicone,” or “-siloxane” high on the list, it’s silicone-based. The golden rule of surface architecture is simple: like attracts like. A water-based primer should be layered over a water-based moisturizer, and a silicone-based primer works best over a silicone-based moisturizer.
When you break this rule, chaos ensues. Silicones create an ultra-smooth, almost slick, water-repellent film on the skin. As the experts at AAVIK Makeup Academy note, this is why a water-based formula struggles to adhere. As they explain in their guide to achieving a flawless base, ” When you try to layer a water-based product over a silicone-based one, the water-based formula can’t properly grip the slick surface, causing it to slide around, separate, or ball up.” This chemical repulsion is the direct cause of pilling and patchiness. By ensuring your base layers are from the same family, you create a stable, unified structure where each layer bonds seamlessly to the next.
Shaving vs. Waxing: Which gives a smoother canvas for foundation?
After addressing cellular texture and product chemistry, we turn to the physical surface itself. Vellus hair, or “peach fuzz,” is a natural feature, but it can interfere with a truly seamless foundation application. These fine hairs can catch the light and trap pigment, preventing foundation from sitting flush against the skin. The two common removal methods are waxing and shaving (often referred to as dermaplaning when done on the face), and for makeup artistry, one is clearly superior.
Waxing removes hair from the root. While effective for longer-lasting results, it’s an aggressive process that can cause inflammation, redness, and sensitivity. Applying foundation over freshly waxed skin is a recipe for irritation and a blotchy finish. It disrupts the “surface architecture” we’re trying so carefully to build. Shaving, or dermaplaning, on the other hand, is my preferred method for immediate pre-makeup prep. It uses a single, sterile blade to gently glide over the skin, removing vellus hair and the outermost layer of dead skin cells simultaneously.
This provides a dual benefit: exfoliation and hair removal in one step, creating an unparalleled level of smoothness without the trauma of waxing. And to debunk a common myth: no, this will not cause your hair to grow back thicker or darker. Vellus hair has a tapered tip; shaving cuts it at a blunt angle, which can make it feel stubbly as it grows out, but it doesn’t change the hair’s structure or growth rate. As celebrity makeup artist Sarah Lucero explains, the benefits are purely aesthetic. In a commentary on the technique’s benefits for makeup, she states, “Makeup goes on smoother, and you end up using less complexion products…because they work more effectively on smooth, exfoliated skin.” This is the ultimate goal: a surface so perfect that less makeup is required to achieve a flawless look.
The moisturizer mistake that makes your makeup slide off by noon
When faced with dry, flaky skin, the instinct is to reach for the richest, thickest cream you can find. This feels logical, but it’s often the very mistake that causes your makeup to break down and slide off. A single, heavy, occlusive cream creates a dense, greasy layer that sits on top of the skin. Foundation has nothing to grip onto and simply slips around on this slick surface, leading to separation and a short wear time.
The professional approach is not about a single heavy-handed application, but about building a hydration scaffold. This technique, sometimes called “skin flooding,” involves layering multiple, thin, watery products to build deep, lasting hydration from within, rather than just coating the surface. The goal is skin that is plump and hydrated, but with a satin, grippy finish, not a greasy one. This provides the perfect balance of moisture and texture for makeup to adhere to.
The process starts with the thinnest consistency and works up. Think of it as dressing your skin in layers: a hydrating mist first, followed by a hyaluronic acid serum on damp skin to pull that moisture in, then a lightweight lotion or gel-cream. Each thin layer absorbs fully, contributing to an inner reservoir of hydration. This multi-step approach ensures the skin is deeply quenched without leaving a heavy film on the surface. It creates a plump, resilient structure that foundation can meld with, becoming one with the skin instead of floating on top.
By building this internal support system, you solve the root problem of dehydration that causes flakiness, while simultaneously creating the ideal surface texture for long-wearing makeup. Your skin is left feeling comfortable and supple, and your foundation has a stable, non-greasy base to lock onto for the entire day.
When to apply foundation after SPF to avoid patchiness?
Sunscreen is the most important, non-negotiable step in any daytime routine, but it’s also the most likely to sabotage your makeup if not handled with precision. Applying foundation too soon or with the wrong technique over SPF is the number one cause of pilling, patchiness, and a streaky finish. The issue lies in disrupting the protective film integrity of the sunscreen.
When you apply sunscreen, it needs time to set and form a continuous, even film across your skin. This film is what provides the advertised sun protection. If you go in with a brush or sponge while this film is still wet, you’re not just applying makeup; you’re essentially wiping away and breaking up your sun protection, creating uneven patches in both your SPF and your foundation. The key is patience. As a general rule, you must wait for the sunscreen to fully absorb and dry down. According to guidelines from NYX Cosmetics, you should wait about 15 minutes for sunscreen to absorb before applying makeup. At a minimum, wait until the skin is no longer tacky to the touch.
Once the wait time is over, the application technique is paramount. Traditional buffing or swiping motions with a brush will create shear force that disturbs the delicate SPF film. The professional method is to press, don’t rub. Using a damp makeup sponge, gently stipple or press the foundation onto the skin. This motion deposits the pigment without dragging or disrupting the layer underneath, preserving both your sun protection and ensuring a smooth, even makeup application. This is a non-negotiable technique for any artist working on set or for a long-wear event.
Your Action Plan: The Press, Don’t Rub Method for Foundation Over SPF
- Wait for Absorption: After applying sunscreen, wait a minimum of 3-5 minutes. The ideal is closer to 15, but the absolute key is that the skin is no longer tacky.
- Use a Damp Sponge: A damp makeup sponge is your best tool. It helps blend the foundation seamlessly without absorbing too much product or disturbing the SPF layer.
- Apply with Stippling Motions: Dispense foundation on the back of your hand, pick it up with your sponge, and apply to your face using gentle pressing or dabbing motions.
- Avoid Rubbing or Swiping: Consciously avoid any dragging, buffing, or circular rubbing motions. These actions are what cause the sunscreen to pill and the foundation to streak.
- Build Coverage in Layers: If you need more coverage, apply a second thin layer using the same pressing technique, rather than applying one thick, heavy layer.
How to apply SPF to ensure spot prevention in high UV index?
While proper application over SPF is key for makeup, the effectiveness of the SPF itself is the foundation of long-term skin health and an even skin tone. Preventing sun spots (hyperpigmentation) is not just about wearing sunscreen, but about applying it with enough quantity and precision to create a truly uniform shield, especially on high UV index days. Most people drastically under-apply sunscreen, getting only a fraction of the protection stated on the bottle.

The gold standard for quantity is the “Two-Finger Rule.” This means squeezing two full lengths of sunscreen, from the tip to the base of your index and middle fingers, for your face and neck. This simple measurement ensures you’re applying the clinically tested amount (2 milligrams per square centimeter of skin) needed to achieve the SPF number on the label. Anything less leaves your skin vulnerable, allowing UV rays to penetrate and trigger the melanin production that leads to dark spots.
On days with a high UV index, or for those prone to hyperpigmentation, I recommend the “Double Application” technique for an even more robust shield. This involves applying a full two-finger amount, waiting a minute or two for it to set, and then applying a second, full two-finger amount. This method helps cover any spots you may have missed during the first pass and builds a more substantial, uniform protective film. It’s an insurance policy for your skin, ensuring every millimeter is shielded from UV damage. This meticulous approach is how you truly prevent new spots and keep your skin canvas even and clear for the future.
- Measure Accurately: Use the Two-Finger Rule to dispense the correct amount for your face and neck.
- Distribute Evenly: Dot the sunscreen on your forehead, cheeks, nose, and chin before blending to ensure it’s spread evenly, not concentrated in one area.
- Apply the First Layer: Gently blend the sunscreen across your entire face, neck, and ears, ensuring you reach the hairline and jawline.
- Wait and Set: Allow the first layer to set for 1-2 minutes.
- Apply the Second Layer: Repeat the process with a second measured amount to build a truly uniform and protective shield, covering any missed spots.
Why facial massage reduces cortisol levels after a chaotic workday?
The connection between our skin’s appearance and our stress levels is profound and scientifically validated. After a chaotic day, our bodies are flooded with cortisol, the primary stress hormone. High cortisol can trigger inflammation, impair skin barrier function, and lead to breakouts and dullness—all of which undermine the flawless canvas we work so hard to create. While we often think of skincare as topical treatments, a simple, mindful facial massage can be a powerful tool to physiologically counteract this stress.
The magic lies in the stimulation of the parasympathetic nervous system, our body’s “rest and digest” mode. The skin on our face is rich with nerve endings connected to the vagus nerve, a major component of this system. When you use slow, firm, and rhythmic pressure during a facial massage, you send signals of safety and calm directly to your brain. This tactile stimulation acts as an ‘off-switch’ for the ‘fight or flight’ response that produces cortisol.
As you massage, you are also physically releasing tension held in the facial muscles—the clenched jaw, the furrowed brow. This muscular release further signals to the nervous system that the perceived threat has passed. The body responds by down-regulating cortisol production and increasing the release of ‘feel-good’ neurotransmitters like oxytocin and serotonin. The result is not just a feeling of relaxation, but a measurable biochemical shift that reduces inflammation and improves circulation. This boost in blood flow delivers more oxygen and nutrients to the skin cells, resulting in an immediate glow and a healthier, more resilient canvas over time. It’s a clear demonstration that caring for your skin is also caring for your entire nervous system.
Key Takeaways
- True skin prep is about building a ‘surface architecture’, not just layering products.
- Gentle enzyme exfoliation is superior to harsh physical scrubs for creating a smooth, non-irritated canvas.
- You must match your primer and moisturizer base (water-to-water, silicone-to-silicone) to prevent pilling and separation.
Why Do You Keep Getting Blackheads Despite Washing Your Face Twice a Day?
It’s a frustratingly common skincare paradox: you’re diligent about cleansing, yet you’re still plagued by persistent blackheads. The issue is rarely a lack of cleanliness, but rather a misunderstanding of what you need to clean. A blackhead is not simply surface dirt; it’s a plug of hardened sebum (oil) and dead skin cells that has oxidized and turned black upon exposure to air. Modern skincare, particularly long-wear foundation and high-performance SPF, creates a formidable, often water-resistant barrier that a simple water-based cleanser cannot penetrate.
Washing your face twice a day with a standard cleanser might remove surface grime, but it leaves behind the complex matrix of silicones, polymers, and pigments from your makeup and sunscreen. This layer traps sebum and dead cells in the pore, leading to congestion. To truly solve the problem, you must adopt the professional cleansing method used to remove heavy-duty on-set makeup: the double cleanse. This two-step process is the only way to effectively dissolve every layer on your skin.
This method ensures that you are truly cleaning your skin itself, not just the top layer of product. Once the oil-based barrier is gone, your treatment products (like BHA/salicylic acid, which is oil-soluble) can actually penetrate the pores to dissolve the hardened sebum plugs from within. This is how you break the cycle of congestion and finally achieve the clear, smooth canvas you’ve been working towards.
- First Cleanse (Oil-Based): Start with dry hands and a dry face. Massage a cleansing oil or balm into your skin for 60 seconds. The oil will bind to and dissolve the oils, silicones, and pigments in your makeup and SPF.
- Emulsify and Rinse: Add a splash of lukewarm water to your face. The oil will emulsify into a milky consistency. Continue massaging for a moment, then rinse thoroughly.
- Second Cleanse (Water-Based): Now that the barrier is gone, follow up with your regular gentle, water-based cleanser. This step removes any remaining residue and cleans the skin itself.
- Pat Dry and Treat: Gently pat your face dry. Your skin is now perfectly prepped for serums or treatments like BHA to effectively penetrate and decongest the pores.
By shifting your perspective from merely covering the skin to meticulously architecting its surface, you unlock the secret to a truly flawless, long-lasting makeup application. Begin today by integrating these professional techniques to transform your results.